Physical Address
304 North Cardinal St.
Dorchester Center, MA 02124
Physical Address
304 North Cardinal St.
Dorchester Center, MA 02124
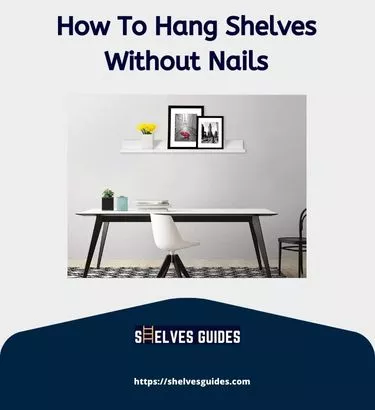
Not every one of us can afford a place of our own. Most of the population of this world lives in rental spaces. It’s a money thing. But putting up shelves in the place you live is not a money thing.
Putting up shelves is a choice thing. Some people like to live in a space that is tidy and clean. Those people prefer installing shelves even if they are living in a rental space. So, for those people, in this article, I will show you how to install shelves in a rental. But first, let’s answer a few questions that arise on a regular basis whenever anyone asks- “can you install shelves in an apartment”.
Table of Contents
The reason why people are being so specific regarding shelf installation in rental spaces is that when we rent a place, we are bound to live by the rules set by the landlord. Some landlords allow certain small-scale structural or decoration changes to the apartment.
But most landlords don’t let the tenants make any changes to the apartment at all. This definitely includes installing shelves. So, in the case where the landlord is problematic and has strict rules, the answer to the question- Can I hang shelves in an apartment, is no, you can’t.
Again, some landlords let you put up shelves or even hooks as long as you are not drilling the wall. So, without making any holes you can put up hooks and shelves according to your need.
For those who are not living under strict rules and are allowed to install shelves in their rental space, here’s a step by step guide on how you can install shelves both with or without making holes or using wall plugs.
I will guide you through the process and show you both ways where you might have to drill and get things done without drilling. So, stay tuned and follow the instructions that abide by the rules set by your landlord.
[ If you are interested in learning How to Remove Floating Shelves, we have step-by-step instructions for you. ]
In this method, we will make holes in the wall using a drill and use wall plugs.

Choose an open space along the wall for your shelves. The exact placement of the shelves is primarily a question of personal opinion. However, there are a few crucial aspects to consider when selecting a mounting location, such as closeness to surrounding wall studs and the dimension of the shelves in comparison to nearby items.
Locate the two wall studs nearest to the desired location using a stud finder. Turn on your stud finder and place it plain against the wall approximately 1 foot (0.30 m) to the left of where you would like the shelves to go. While it’s in place, activate it by pushing the button on the side of the hand and gently moving the device to the right.
If the stud finder detects a stud, it will start beeping. A stud finder can cost you about $30. If you do household construction work yourself, a stud finder at home will be extremely helpful for you.
With a pencil, mark the placement of the studs. Once you’ve successfully located the stud or studs, mark each location with a little dot. Once you begin drilling, the markings you make will act as a visual guide. They’ll also serve as a handy reminder so you don’t have to go looking for the studs again provided you lose them.
Set one of your shelf’s mounting brackets to the required height. Examine the bracket’s positioning to see how it appears, and alter it by shifting it above or below if required. Again, as long as you keep between the studs, where you position your shelves is basically up to you.
Make a mark on the wall for the location of your bracket’s screw holes. Check whether the screw holes are parallel to the studs or not. When you’re happy with the positioning of the first bracket, draw a dot on the wall with the tip of the pencil in the screw hole on the backside. This mark will act as a reference for drilling the first hole and aligning your second hole.
Draw lines from the preliminary hole marking the stud on the opposite side. Hold a carpenter’s level horizontally beside your initial pencil mark, checking to ensure it’s properly centered.
Run your pencil up the top of the surface till you approach the marking you drew to indicate where the second stud should be. This line will match to the shelf’s top.
Make a second mark for the other pilot hole. You’ve now clearly noted where each initial hole for the shelf mounting bracket has to be drilled and linked the two places with a straight line.
Both holes for the mounting screws should be drilled. Each screw’s tip should be aligned with the matching pilot hole mark. Drive the screws into the wall stud to a depth of approximately 1 inch with a power drill or screwdriver. Then, gently take the screws out from the wall.

Using the hole you just drilled, attach the brackets to the wall. Reinstall the screws after aligning the screw holes of each mounting bracket with the holes. Turn the screw with a screwdriver or drill until they are tightly embedded in the wall. Before cinching your brackets, double-check that they are straight and even.
Place your shelves on top of the mounting brackets. You may be able to just lay your shelves on top of the brackets, depending on the form of your shelves. Remove any apparent pencil marks that have remained on the wall.
Examine the area surrounding the newly-installed shelves for indications of the marks you made when looking for wall studs and setting the shelf brackets. Erase them as well.
[ If you are curious to learn more about how to hang wire shelves without brackets? ]
Can you put up a shelf without wall plugs? Well, in this part, we will show you how to put up a shelf without holes. No holes mean no wall plugs. Bear with the idea.
Purchase sticky fittings to keep light things in place. Consider purchasing an adhesive fixture instead of setting up a shelf to keep light goods such as clothes, jewelry, and tiny devices. Hooks and hangers are the most prevalent forms of adhesive fixtures, which may be found at most big-box retailers. However, you may buy a variety of more distinctive fixtures online.
Stick objects directly to the wall by applying adhesive strips to them. Rather than installing a shelf to exhibit a picture, artwork, or other reasonably flat objects, consider adhering the piece directly to your wall with adhesive strips.

To attach the strips, saturate the rear of your item with rubbing alcohol and allow it to dry for 5 minutes. Then, glue the strips to the object’s corners and secure the object to the wall as you would a shelf.
Buy a free-standing shelf to add extra room and support. An adhesive-mounted shelf may not always offer the load capacity or storage capabilities you want. Consider purchasing a free-standing shelving system, such as a bookcase or storage rack, in these circumstances.
I hope from the answer that we accumulated on the question of how to install shelves in a rental, you already have gotten the clue of what you have to do. You can opt-in any of the methods or even go for the top that I gave.
My personal suggestion would be not to go for the drilling method. That can cause harm to the structure of the home which is owned by someone else. You don’t wanna mess up with a wall stud of someone else’s house.